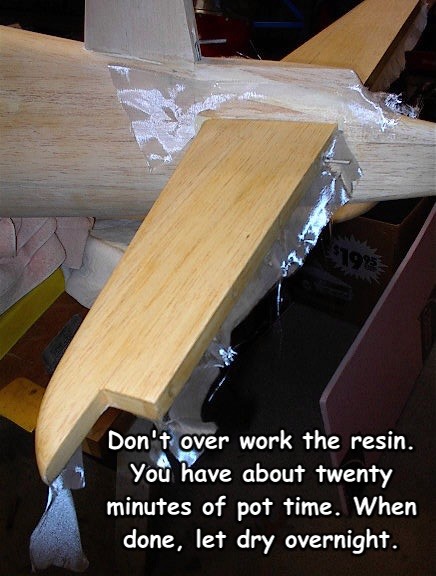
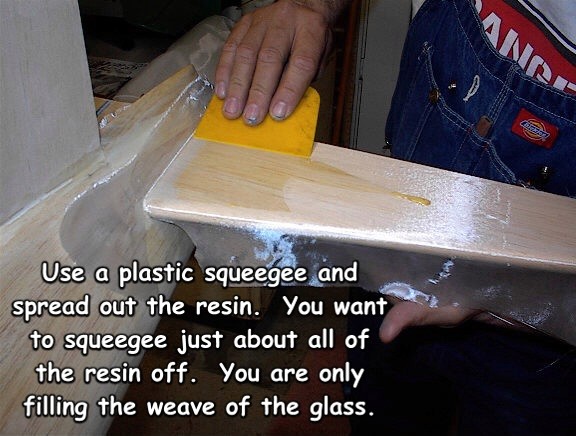
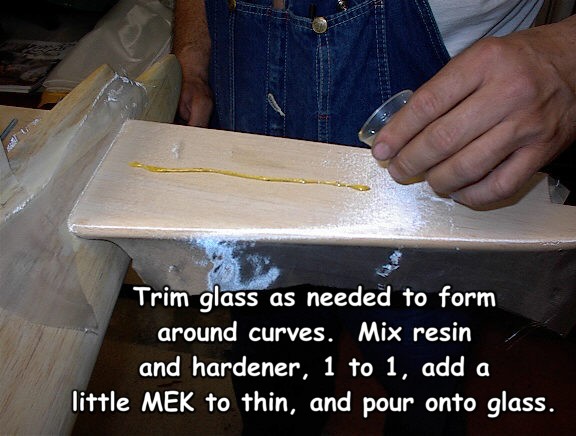
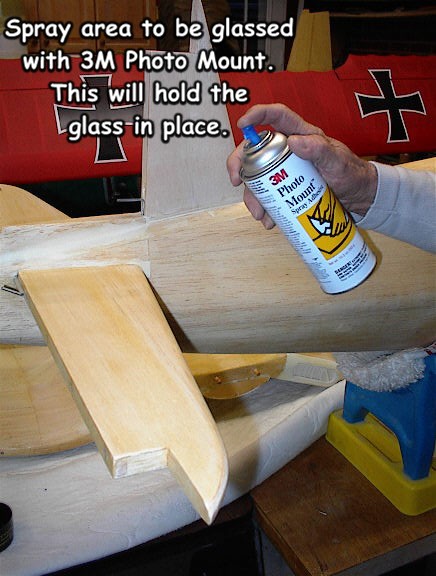
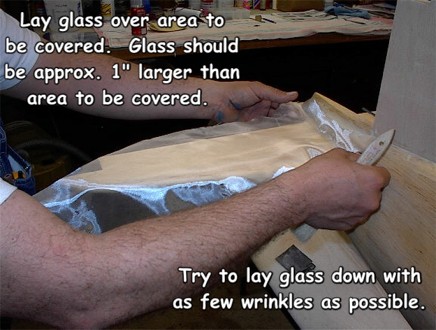
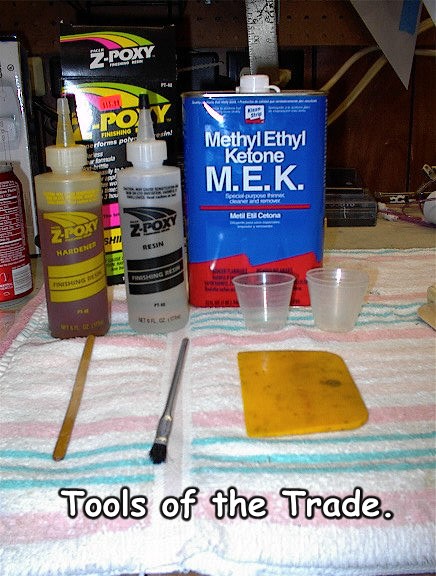
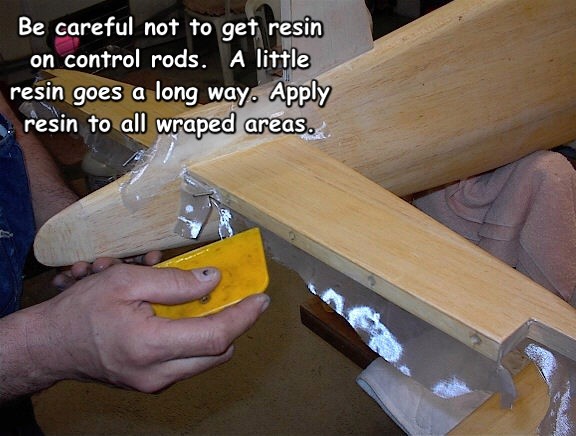
I don't claim to have developed these techniques or for that matter that they are the easiest or most up to date versions, just that they have proven their worth to me. My Dad is currently building a Top Flight Giant Scale Corsair, so I thought we would share some of its finishing techniques with you the club member. The aircraft is framed upped, sheeted, and has been sanded. The aircraft is fully sheet and will be fiberglassed. The technique of fiberglassing is what I am going to share with you this month. We are using ½ oz. fiberglass and Z-Poxy finishing resin. I like using the Z-poxy system for several reasons. It is mixed just like regular e-poxy (1 to 1), once cured it sands very easily, and you can buy it in a reasonable quantity for model use. I use MEK to thin with, read and follow all directions when using, but denatured alcohol can also be used. 3M Photo Mount is used for holding the cloth to the model while applying the resin. Mixing cups, stir stick, tack rag, plastic squeegee, acid brush, and china bristle brush (1"-2") are some of the tools needed. Follow along with the pictures for the procedure that I use. -- Ken Howard, Jr.
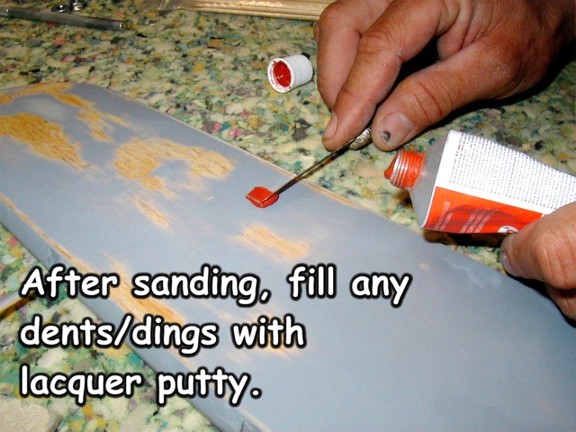
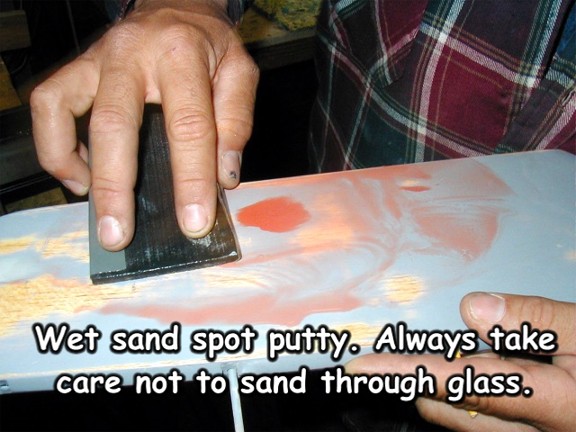
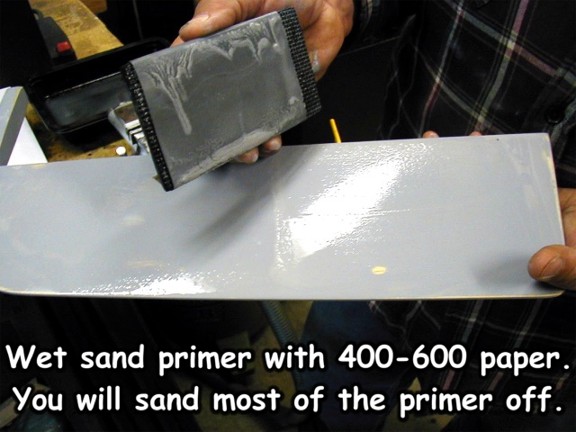
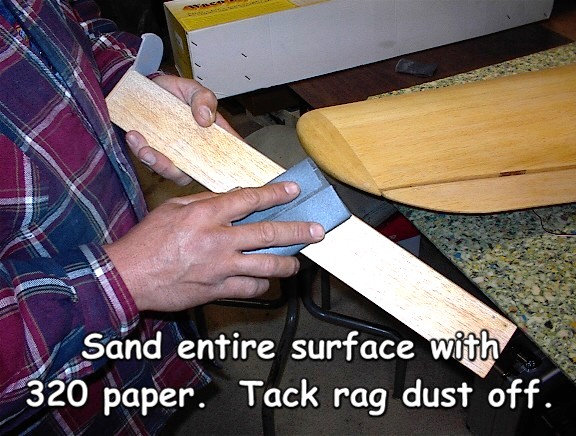
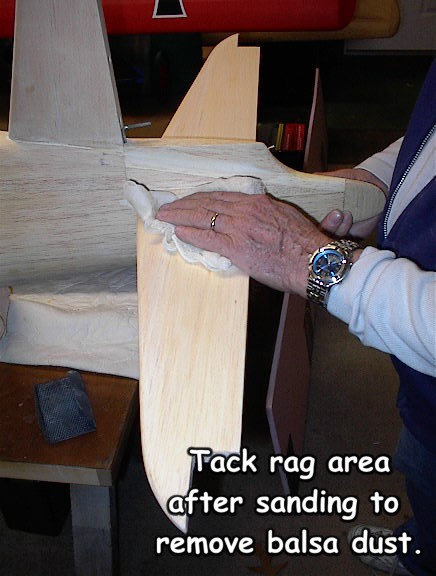
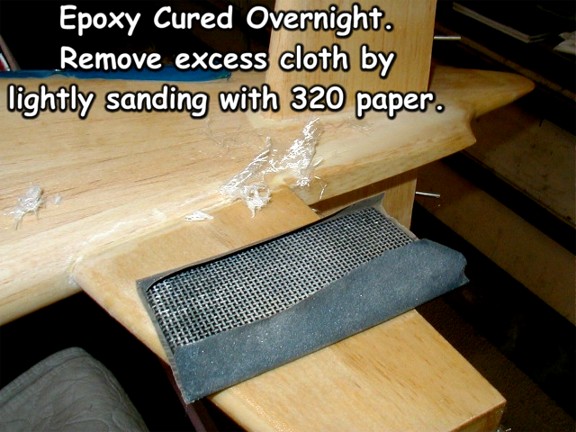
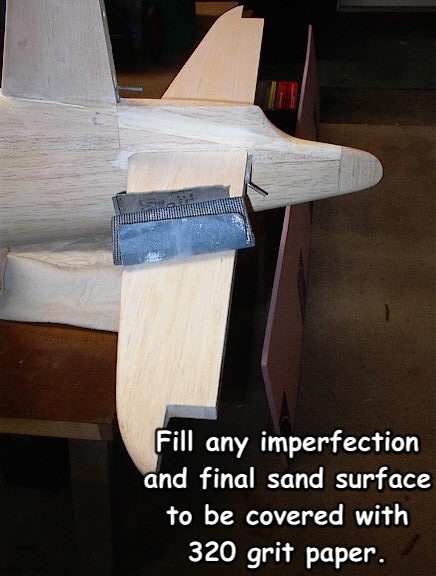
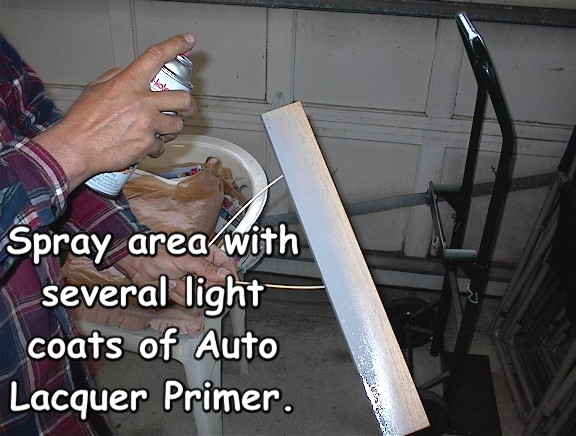
In this part, I will walk you though finishing the glassing process and also we will focus on preparing the model to receive its finish. In the first part, we finished glassing a sheeted area and left it to dry overnight. To remove the excess cloth that is hanging over the edge of the finished area, take some 320 paper and lightly sand the edge where the excess material meets the edge of the glassed area. The excess cloth will come off as if you were cutting it with a knife. Next, sand the glassed area with 320 grit paper. Always be careful not to sand through the glass and expose the balsa beneath. If you happen to do this, you will need to re-glass just that area, let cure, and sand again. Once the glassed area is sanded, wipe it clean with a tack rag. Now we are ready to finish filling the weave of the glass by priming and sanding. The epoxy finishing resin will have filled most of the weave of the fiberglass, but not all of it. To fill the rest of the weave, spray the part with several light coats of an automotive lacquer primer. This is the same primer you can find at the auto parts store or Home Depot. Wet sand the primed area with 400-600 grit paper. You will take off a majority of the primer. Check the piece for dent/dings and apply lacquer body putty as needed, sand off once dry. That's all there is to preparing a glassed area for detailing and finish painting.